
How do you take a successful dental impression at home?
Published by Thomas Callard · Updated on 29 June 2026
To make a custom-fit mouthguard, the dental impression is an essential step. It lets us create protection adapted to your teeth, with a better hold, more comfort and better stability in the mouth.
At Proteksports, you can take the impression at home using the kit sent after your order. The goal is simple: get a clean, deep, usable impression to make your personalised mouthguard.
Before you start: take care with orthodontic treatment
Custom-fit mouthguards that require a dental impression are not recommended for people undergoing orthodontic treatment, particularly with braces.
If you wear an orthodontic appliance, ask your orthodontist for advice before taking any impression.
Why does the dental impression matter?
A custom-fit mouthguard (or gum shield) is made from the exact shape of your teeth. Unlike a boil-and-bite mouthguard (thermoformable, moulded at home in hot water), it isn't simply moulded in hot water: it is made from your impression.
The more precise the impression, the better the finished mouthguard will fit your mouth.
A good impression gives you:
- a better hold in the mouth;
- more comfort during exertion;
- protection better adapted to your teeth;
- better stability during training or competition;
- less discomfort when you breathe or talk.
Step 1: choose the right impression tray
Before mixing the putties, start by trying the impression trays supplied in your kit.
Choose the one that covers all your teeth and leaves a little space at the sides. The impression tray should feel slightly roomy in your mouth, but your lips must be able to close over the front of it.
This step matters: if the impression tray is too small, your teeth may end up too close to the edges. If the wrong impression tray is chosen, the impression may lack precision.
Step 2: mix the two putties quickly
Your kit contains two silicone putties: a blue putty and a white putty.
Mix the two putties until the colour is even, with no streaks of white. Mixing must be quick: about 25 to 30 seconds maximum.
Timing matters, because the silicone starts to harden as soon as you begin mixing it. So you need to move through the steps quickly.
Step 3: form a roll of silicone
Once the putties are thoroughly mixed, roll the silicone into a sausage shape.
The roll should be thicker in the middle so that your teeth can sink well into the material. Then place the silicone evenly in the impression tray.
The aim is to have enough material over the whole area where your teeth will sit.
Step 4: place the impression tray in your mouth
Stand in front of a mirror. Insert the impression tray into your mouth and line up your teeth with the centre of the silicone roll.
Then bite down gently until you reach the bottom of the impression tray.
This is a key step: your teeth must sink far enough into the material for the impression to be deep and clearly readable.
Step 5: keep still for 3 minutes
Once the impression tray is properly positioned, don't move it any more.
Keep it in your mouth for 3 minutes. During this time, avoid talking, chewing or moving the impression tray.
If you move it while the impression is setting, it may become distorted and unusable.
Step 6: remove the impression gently
After 3 minutes, gently rock the impression tray backwards and forwards to release it from your teeth.
Don't pull sharply. Once it's out, rinse the impression in cold water.
Important: do not remove the impression from the impression tray. It must stay on its tray.
Step 7: get your impression approved
Before sending your impression back, take a clear photo of it.
Then send the photo to 07.61.62.38.88 for approval. We'll tell you whether the impression is correct or needs to be redone.
This step avoids sending an unusable impression and losing time in making your custom-fit mouthguard.
What to do if your impression is approved?
If your impression is approved, leave it on the impression tray.
Put it back in the bag with the unused putties, then send the impression and the unused materials back to the address given in your kit.
You can reuse the padded envelope and the label with our address for the return.
What to do if your impression isn't usable?
If your impression isn't usable, you'll need to make a second attempt with the remaining putties.
In that case, follow our instructions and take the time to correct the mistake: poor centring, an impression that's too shallow, teeth too close to the edges or movement while it was setting.
How do you recognise a good impression?
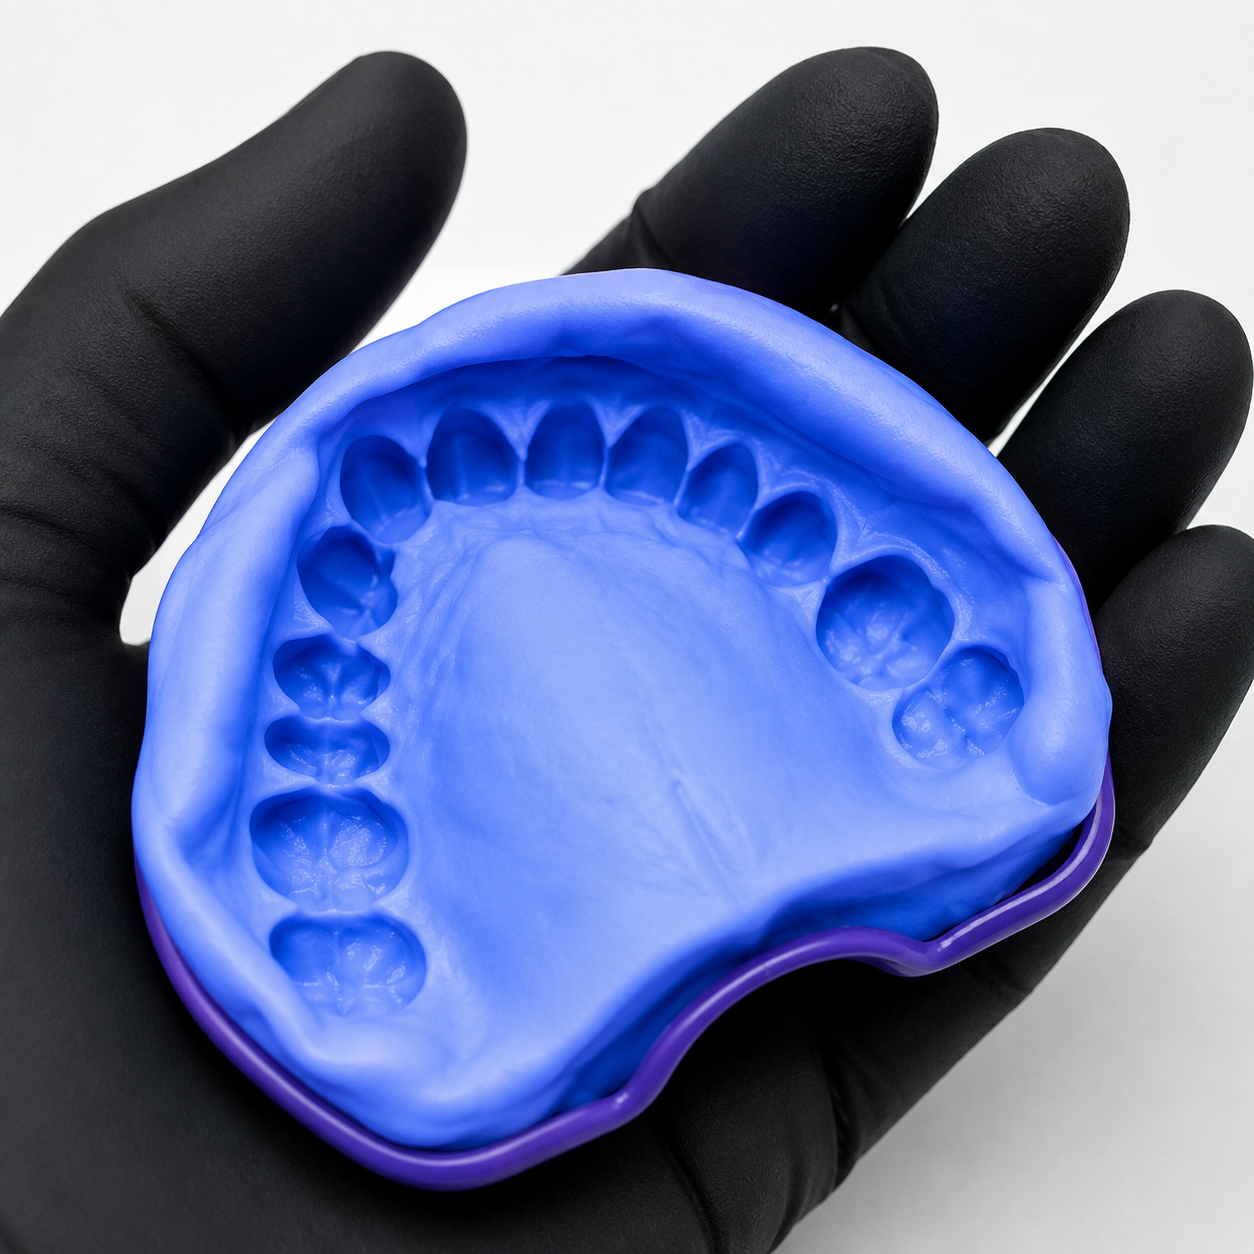
A good impression must be clean, deep and centred.
The teeth must be clearly visible in the material. They must not be too close to the sides of the impression tray. The impression must not be distorted or too faint.
A successful impression must clearly show the shape of the teeth so that a precise, comfortable mouthguard can be made.
The most common mistakes to avoid
Choosing an impression tray that's too small
If the impression tray doesn't properly cover all your teeth, the impression may be incomplete.
Not mixing the putties quickly enough
The silicone starts to harden quickly. So you need to mix efficiently and move through the steps without waiting.
Not biting deeply enough
If your teeth don't sink far enough into the silicone, the impression will be too shallow.
Moving during the 3 minutes
Once the impression tray is in place, you mustn't move it. Any movement can distort the impression.
Removing the impression from the impression tray
The impression must stay in the impression tray. Don't take it off its tray.
Conclusion
Taking a successful dental impression at home is simple if you follow the steps in order.
Choose the right impression tray, mix the two putties quickly, form a roll of silicone, position it correctly, bite down to the bottom of the impression tray, then keep still for 3 minutes.
Before sending your impression back, send us a photo for approval. This lets us check that it's usable before your custom-fit mouthguard is made.
A successful impression is the foundation of a comfortable, stable mouthguard suited to your sport. To go over the steps again with pictures, see the dental impression kit instructions.